Ionic 2 Lists
Ionic 2 Lists : Lists are great way display data in row format, Ionic 2 provides various predefined which we can use easily. Here in this tutorial we are going to explain how you can create & use various lists in Ionic 2. You can also use our online editor to run the example online.
Ionic 2 Lists Example
There are following types of Lists available in Ionic 2.
- 1. Basic Lists
- 2. Inset List
- 3. List Dividers
- 4. List Headers
- 5. Icon List
- 6. Avatar List
- 7. Multi-line List
- 8. Sliding List
- 9. Thumbnail List
Let us go one by one to understand the lists in Ionic 2.
Basic Lists
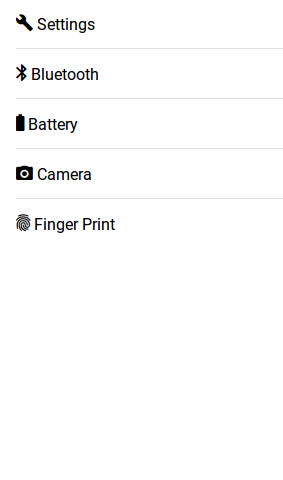
To create basic list ion-list and ion-item is used to item in the list and each items are separated by dividers.
Here is an example of basic lists –
Ionic 2 Basic Lists Example-
<ion-list>
   <ion-item>
      <ion-icon name="build"></ion-icon>
      Settings
   </ion-item>
   <ion-item>
      <ion-icon name="bluetooth"></ion-icon>
      Bluetooth
   </ion-item>
   <ion-item>
      <ion-icon name="battery-full"></ion-icon>
      Battery
   </ion-item>
   <ion-item>
      <ion-icon name="camera"></ion-icon>
      Camera
   </ion-item>
   <ion-item>
      <ion-icon name="finger-print"></ion-icon>
      Finger Print
   </ion-item>
</ion-list>
|
If you run the above example it will produce the output something like this –
Inset Lists
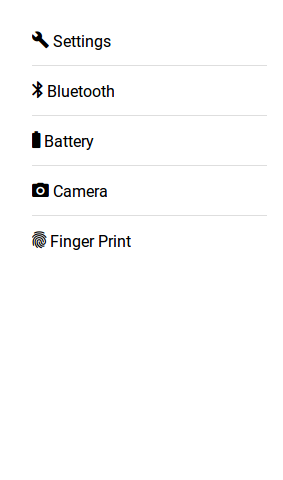
Inset list adds margin outside the list, add inset attribute to ion-list.
Here is an example of Inset list –
Ionic 2 Inset Lists Example-
<ion-list inset>
   <ion-item>
      <ion-icon name="build"></ion-icon>
      Settings
   </ion-item>
   <ion-item>
      <ion-icon name="bluetooth"></ion-icon>
      Bluetooth
   </ion-item>
   <ion-item>
      <ion-icon name="battery-full"></ion-icon>
      Battery
   </ion-item>
   <ion-item>
      <ion-icon name="camera"></ion-icon>
      Camera
   </ion-item>
   <ion-item>
      <ion-icon name="finger-print"></ion-icon>
      Finger Print
   </ion-item>
</ion-list>
|
If you run the above example it will produce the output something like this –
List Dividers
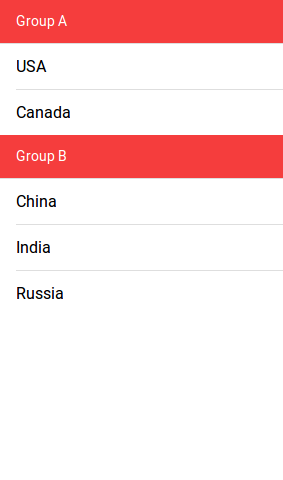
List dividers are used to divide items into groups, ion-item-group is used insted of ion-list. ion-item-divider component is used to divide the group into section.
Ionic 2 List Dividers Example-
<ion-content>
  <ion-item-group>
    <ion-item-divider color="danger">Group A</ion-item-divider>
    <ion-item>USA</ion-item>
    <ion-item>Canada</ion-item>
  </ion-item-group>
  <ion-item-group>
    <ion-item-divider color="danger">Group B</ion-item-divider>
    <ion-item>China</ion-item>
    <ion-item>India</ion-item>
    <ion-item>Russia</ion-item>
  </ion-item-group>
</ion-content>
|
If you run the above example it will produce the output something like this –
List Headers
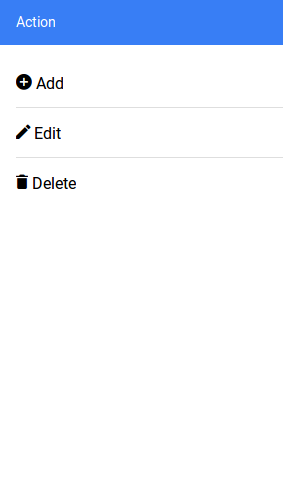
ion-list-header is used to add header in the List. Here is simple example of header in Lists-
Ionic 2 List Headerss Example-
<ion-list>
  <ion-list-header color="primary">
    Action
  </ion-list-header>
  <ion-item><ion-icon name="add-circle"></ion-icon> Add</ion-item>
  <ion-item><ion-icon name="create"></ion-icon> Edit</ion-item>
  <ion-item><ion-icon name="trash"></ion-icon> Delete</ion-item>
</ion-list>
|
If you run the above example it will produce the output something like this –
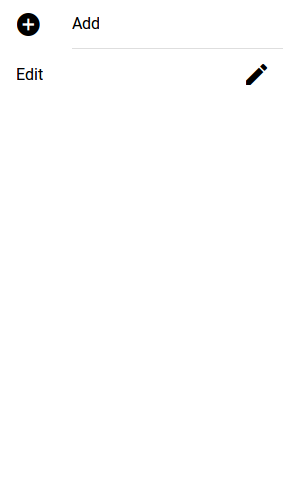
Icon List
You can also add icons in lists using Ionic 2 icons ie- ion-icon. You can also assign the position of icon using
item-left and item-right attributes. You can also set the size of the icons using the small and large
attributes, default size is small. Here is an example of Icons in Lists-
Ionic 2 Icons in list Example-
<ion-list> <ion-item><ion-icon name="add-circle" item-left></ion-icon> Add</ion-item> <ion-item><ion-icon name="create" item-right></ion-icon> Edit</ion-item> </ion-list> |
If you run the above example it will produce the output something like this –
Avatar List
ion-avatar Component is used to create avatar list in ionic 2. item-left and item-right attributes are used to
add the position of the avatar.
Ionic 2 Avatar List | Image Example-
<ion-list>
  <ion-item>
    <ion-avatar item-left>
      <img src="//tutorialsplane.com/runtest/ionic/img/profile.jpg">
    </ion-avatar>
    <h2>Jhon</h2>
    <p>Hello </p>
  </ion-item>
  <ion-item>
    <ion-avatar item-left>
      <img src="//tutorialsplane.com/runtest/ionic/img/profile.jpg">
    </ion-avatar>
    <h2>Jhon</h2>
    <p>How Are You?? </p>
  </ion-item>
</ion-list>
|
If you run the above example it will produce the output something like this –

Multiline List
Multiline list contains the multiple lines of text. You can create multiline text list simply as below-
Ionic 2 Multiline List Example-
<ion-list>
  <ion-item>
    <ion-avatar item-left>
      <img src="//tutorialsplane.com/runtest/ionic/img/profile.jpg">
    </ion-avatar>
    <h2>Jhon</h2>
    <h3 style="color:orange;">Online</h3>
    <p>Hello </p>
  </ion-item>
  <ion-item>
    <ion-avatar item-left>
      <img src="//tutorialsplane.com/runtest/ionic/img/profile.jpg">
    </ion-avatar>
    <h2>Jhon</h2>
    <h3 style="color:green;">Typing..</h3>
    <p>How Are You?? </p>
    <p>..... </p>
  </ion-item>
</ion-list>
|
If you run the above example it will produce the output something like this –

Sliding List
Sliding list is used to create list items that can be swipped left or right. ion-item-sliding component is used to create
sliding list and ion-item-options component is used to add options. Here is an example of sliding List –
Ionic 2 Sliding List Example-
<ion-list>
<ion-item-sliding>
  <ion-item>
    <ion-avatar item-left>
      <img src="//tutorialsplane.com/runtest/ionic/img/profile.jpg">
    </ion-avatar>
    <h2>Jhon</h2>
    <h3 style="color:orange;">Online</h3>
    <p>Hello </p>
  </ion-item>
  <ion-item-options side="left">
      <button ion-button color="primary">
        <ion-icon name="text"></ion-icon>
        Text
      </button>
      <button ion-button color="secondary">
        <ion-icon name="call"></ion-icon>
        Call
      </button>
    </ion-item-options>
    <ion-item-options side="right">
      <button ion-button color="primary">
        <ion-icon name="mail"></ion-icon>
        Email
      </button>
    </ion-item-options>
</ion-item-sliding>
</ion-list>
|
If you run the above example it will produce the output something like this –

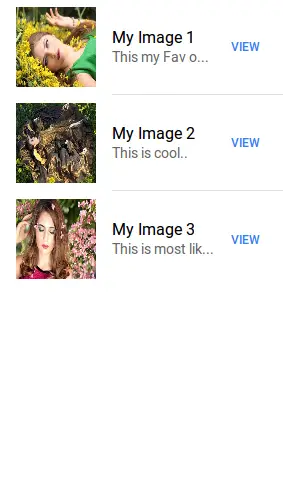
Thumbnail List
ion-thumbnail component is used to create Thumbnail list. Here is simple example of thumbnail list-
Ionic 2 thumbnail List Example-
<ion-list>
  <ion-item>
    <ion-thumbnail item-left>
      <img src="//www.tutorialsplane.com/wp-content/uploads/2017/01/girl-1319114__180.jpg">
    </ion-thumbnail>
    <h2>My Image 1</h2>
    <p> This my Fav one..</p>
    <button ion-button clear item-right>View</button>
  </ion-item>
  <ion-item>
    <ion-thumbnail item-left>
      <img src="//www.tutorialsplane.com/wp-content/uploads/2017/01/girl-1349262__180.jpg">
    </ion-thumbnail>
    <h2>My Image 2</h2>
    <p> This is cool..</p>
    <button ion-button clear item-right>View</button>
  </ion-item>
  <ion-item>
    <ion-thumbnail item-left>
      <img src="//www.tutorialsplane.com/wp-content/uploads/2017/01/girl-1361906__180.jpg">
    </ion-thumbnail>
    <h2>My Image 3</h2>
    <p> This is most liked..</p>
    <button ion-button clear item-right>View</button>
  </ion-item>
</ion-list>
|
If you run the above example it will produce the output something like this –
Advertisements
Add Comment
📖 Read More
- 1. Ionic 2 Loading
- 2. Ionic 2 Menus
- 3. Ionic 2 Modals
- 4. Ionic 2 Popover
- 5. Ionic 2 Radio
- 6. Ionic 2 Range
- 7. Ionic 2 Searchbar
- 8. Ionic 2 Segment
- 9. Ionic 2 Select
- 10. Ionic 2 Slides


