Materialize Table
Materialize Table Materialize Provides Utility Classes to create tables, Using these classes we can create beautiful tabales. Here in this tutorial we are going to explain how to create different-different tables using these classes. You can also use our online editor to edit and run the code online.
Materialize Table Example
You can use the utility classes to create following tables-
Borderless Table
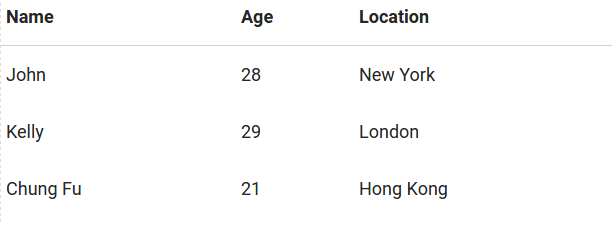
By Default Tables in Materialize Framework are borderless. If you do not Add any class to the table then it will be borderless table. Here is an example of borderless table-
How to create Borderless Table in Materialize ?
<table>
        <thead>
          <tr>
              <th data-field="id">Name</th>
              <th data-field="name">Age</th>
              <th data-field="price">Location</th>
          </tr>
        </thead>

        <tbody>
          <tr>
            <td>John</td>
            <td>28</td>
            <td>New York</td>
          </tr>
           <tr>
            <td>Kelly</td>
            <td>29</td>
            <td>London</td>
          </tr>
           <tr>
            <td>Chung Fu</td>
            <td>21</td>
            <td>Hong Kong</td>
          </tr>
         </tbody>
</table>
|
If you run the above example it will produce output something like this –

Bordered Table
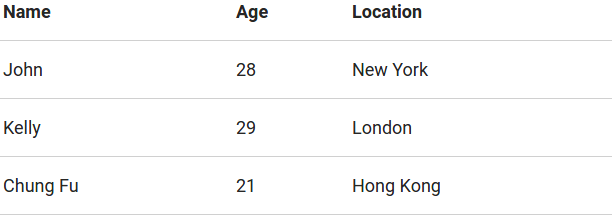
To create Bordered Table add class bordered to the table tag. Here is an example of bordered table –
How to create Bordered Table in Materialize ?
<table class="bordered">
        <thead>
          <tr>
              <th data-field="id">Name</th>
              <th data-field="name">Age</th>
              <th data-field="price">Location</th>
          </tr>
        </thead>

        <tbody>
          <tr>
            <td>John</td>
            <td>28</td>
            <td>New York</td>
          </tr>
           <tr>
            <td>Kelly</td>
            <td>29</td>
            <td>London</td>
          </tr>
           <tr>
            <td>Chung Fu</td>
            <td>21</td>
            <td>Hong Kong</td>
          </tr>
         </tbody>
</table>
|
If you run the above example it will produce output something like this –

Striped Table
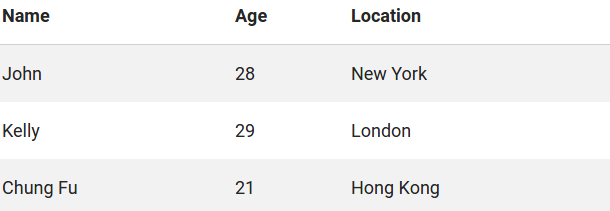
To create Striped Table add class striped to the table tag. Here is an example of Striped table –
How to create Striped Table in Materialize ?
<table class="striped">
        <thead>
          <tr>
              <th data-field="id">Name</th>
              <th data-field="name">Age</th>
              <th data-field="price">Location</th>
          </tr>
        </thead>

        <tbody>
          <tr>
            <td>John</td>
            <td>28</td>
            <td>New York</td>
          </tr>
           <tr>
            <td>Kelly</td>
            <td>29</td>
            <td>London</td>
          </tr>
           <tr>
            <td>Chung Fu</td>
            <td>21</td>
            <td>Hong Kong</td>
          </tr>
         </tbody>
</table>
|
If you run the above example it will produce the output something like this –

Highlight Table
To create Highlight(ie. change row background on hover) Table add class highlight to the table tag. Here is an example of Highlight table –
How to create Highlight Table in Materialize ?
<table class="highlight">
        <thead>
          <tr>
              <th data-field="id">Name</th>
              <th data-field="name">Age</th>
              <th data-field="price">Location</th>
          </tr>
        </thead>

        <tbody>
          <tr>
            <td>John</td>
            <td>28</td>
            <td>New York</td>
          </tr>
           <tr>
            <td>Kelly</td>
            <td>29</td>
            <td>London</td>
          </tr>
           <tr>
            <td>Chung Fu</td>
            <td>21</td>
            <td>Hong Kong</td>
          </tr>
         </tbody>
</table>
|
Centered Table
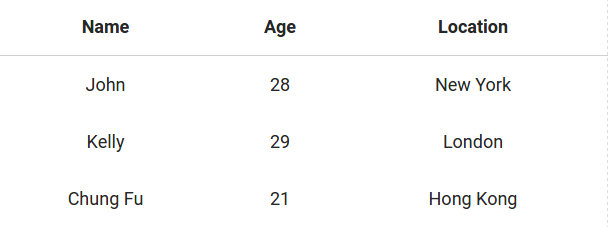
To create Centered Table add class centered to the table tag. Here is an example of Centered table –
How to create Centered Table in Materialize ?
<table class="centered">
        <thead>
          <tr>
              <th data-field="id">Name</th>
              <th data-field="name">Age</th>
              <th data-field="price">Location</th>
          </tr>
        </thead>

        <tbody>
          <tr>
            <td>John</td>
            <td>28</td>
            <td>New York</td>
          </tr>
           <tr>
            <td>Kelly</td>
            <td>29</td>
            <td>London</td>
          </tr>
           <tr>
            <td>Chung Fu</td>
            <td>21</td>
            <td>Hong Kong</td>
          </tr>
         </tbody>
</table>
|
If you run the above example it will produce the output something like this –

Responsive Table
To create Responsive Table add class responsive-table to the table tag. Here is an example of Responsive table –
How to create Responsive Table in Materialize ?
<table class="responsive-table">
        <thead>
          <tr>
              <th data-field="id">Name</th>
              <th data-field="name">Age</th>
              <th data-field="price">Location</th>
          </tr>
        </thead>

        <tbody>
          <tr>
            <td>John</td>
            <td>28</td>
            <td>New York</td>
          </tr>
           <tr>
            <td>Kelly</td>
            <td>29</td>
            <td>London</td>
          </tr>
           <tr>
            <td>Chung Fu</td>
            <td>21</td>
            <td>Hong Kong</td>
          </tr>
         </tbody>
</table>
|
Responsive table will be scrollable on smaller screens.
Advertisements


